After you have created your AWS bucket and your AWS IAM user, the final step is to configure wp2print with this new information.
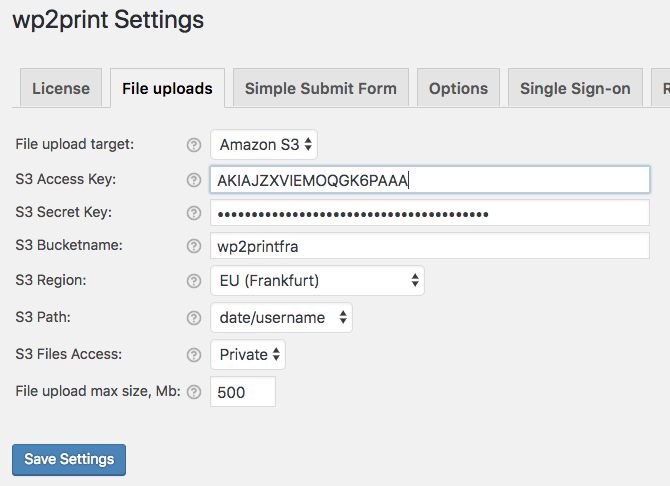
In the admin site, navigate to Settings/wp2print then select the "File upload" tab at top. In the dropdown "File upload target", select "Amazon S3". Then configure the following information:
- S3 Access key
- S3 Secret key
- S3 Bucket name
- S3 Region
- S3 Path
- S3 File access
- Maximum file size

S3 Region:
The S3 Region is a code assigned by Amazon for each of their data centers. The Region codes are displayed in the table below:
| Location | Region |
| US East (Ohio) | us-east-2 |
| US East (N. Virginia) | us-east-1 |
| US West (N. California) | us-west-1 |
| US West (Oregon) | us-west-2 |
| Canada (Central) | ca-central-1 |
| Asia Pacific (Mumbai) | ap-south-1 |
| Asia Pacific (Seoul) | ap-northeast-2 |
| Asia Pacific (Singapore) | ap-southeast-1 |
| Asia Pacific (Sydney) | ap-southeast-2 |
| Asia Pacific (Tokyo) | ap-northeast-1 |
| EU (Frankfurt) | eu-central-1 |
| EU (Ireland) | eu-west-1 |
| EU (London) | eu-west-2 |
| South America (Sao Paulo) | sa-east-1 |
S3 Path:
The "path" added to the URL used to store the files. The "path" will allow you to sort the files into folders by date.
This video illustrates configuring the wp2print settings with your AWS bucket name and credentials: