Here are our recommended settings for the LiteSpeed Cache plugin. Some of these settings are accessed using the Cache link in the left-side sub-menu located underneath LiteSpeed Cache. Other settings are accessed using the Page optimization link in the left-side sub-menu located underneath LiteSpeed Cache.
¶ Litespeed Cache configuration
The settings below are accessed using the Cache link in the left-side sub-menu located underneath LiteSpeed Cache.
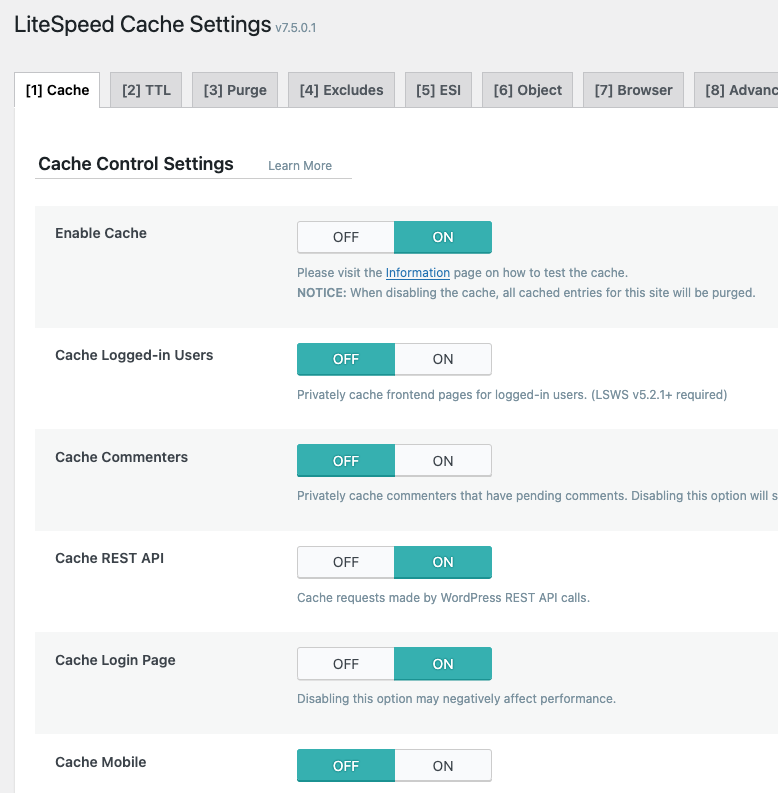
¶ Cache tab
At the top of the Cache tab is a slider that controls whether or not caching is active. This must be set to On.
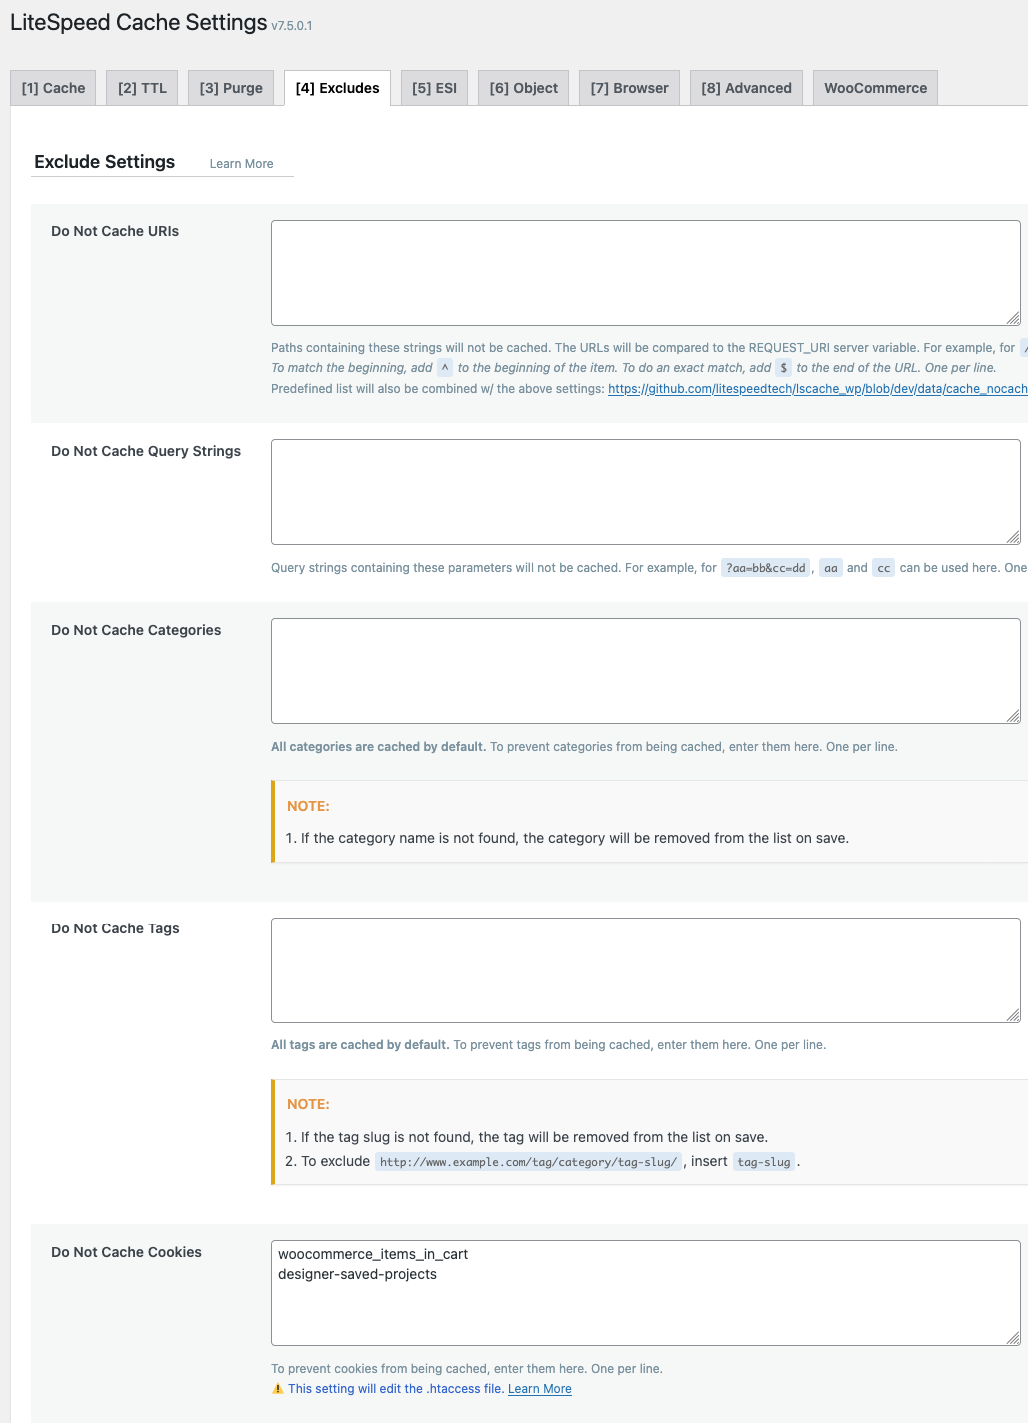
¶ Excludes tab
In the Excludes tab, locate the section with label Do Not Cache Cookies. Enter the 2 cookie names shown below then Save Changes:
woocommerce_items_in_cart
designer-saved-projects
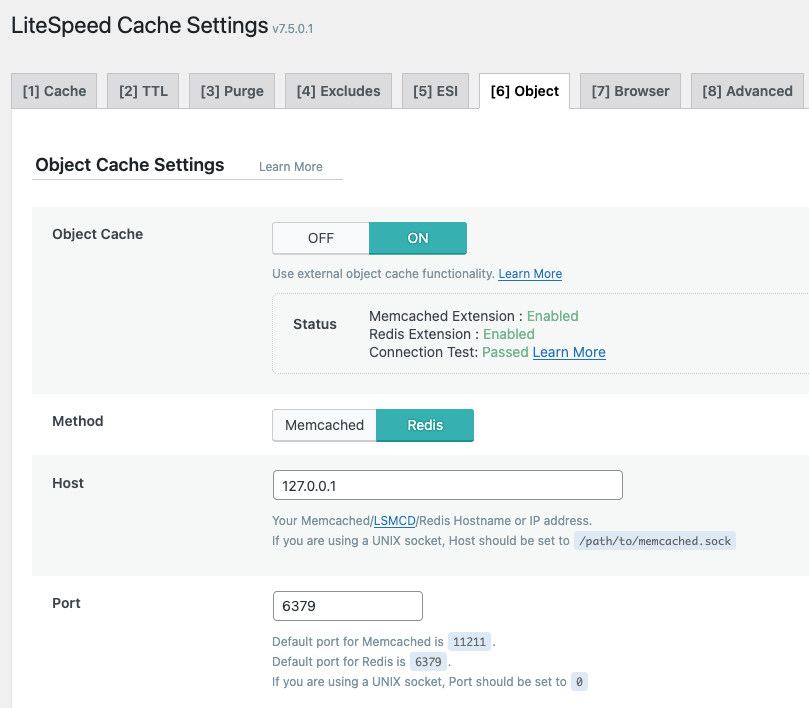
¶ Object tab
In the Object tab, we configure the site to use the REDIS object cache. The following settings should be configured as shown below:
- Enable the Object cache by settings slider to On
- Configure the following value for Method: Redis
- Configure the following value for Host: 127.0.0.1
- Configure the following value for Port: 6379
¶ Page Optimization configuration
The settings below are accessed using the Page Optimization link in the left-side sub-menu located underneath LiteSpeed Cache.
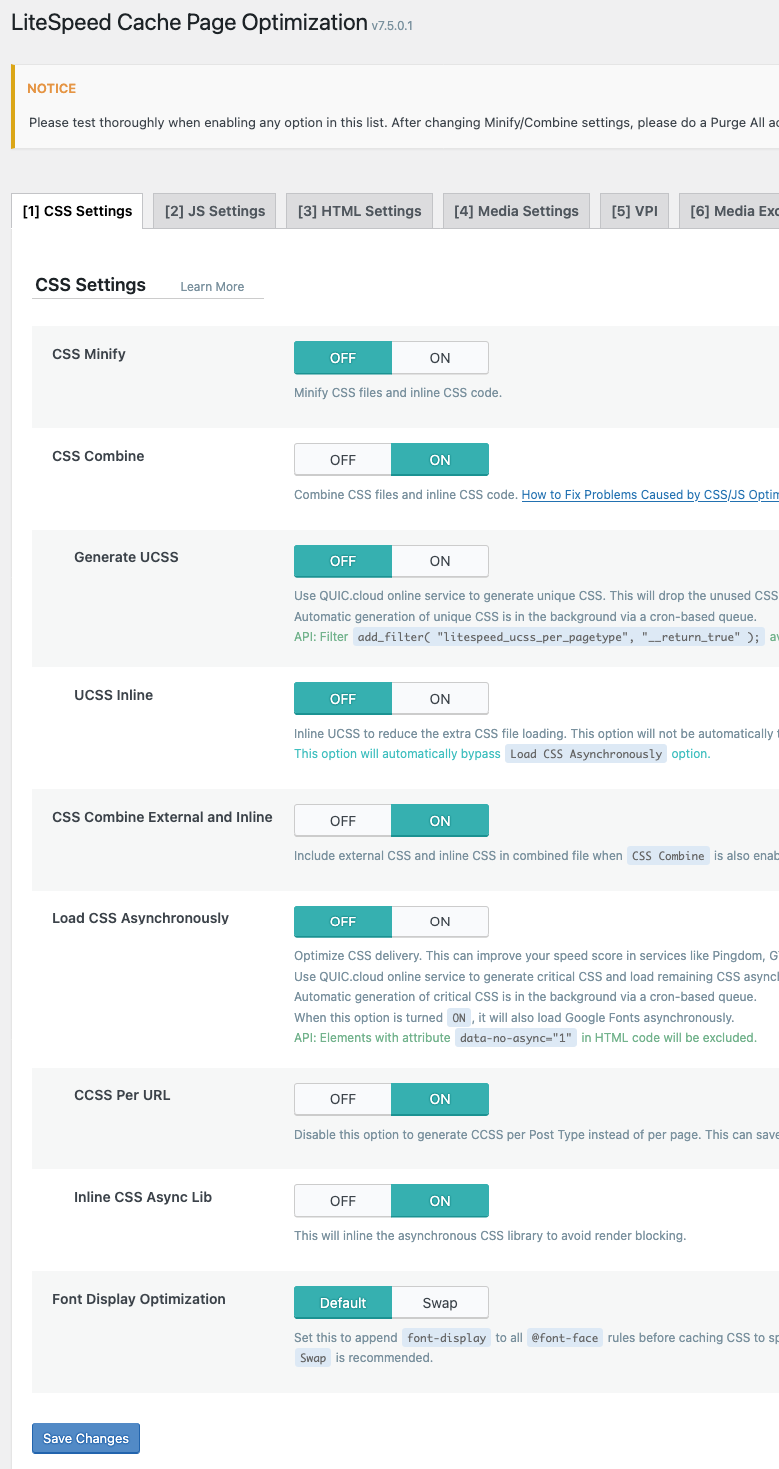
¶ CSS Settings tab
The screenshot below illustrates a set of settings that functions well with wp2print. We recommend against enabling the Minify function:
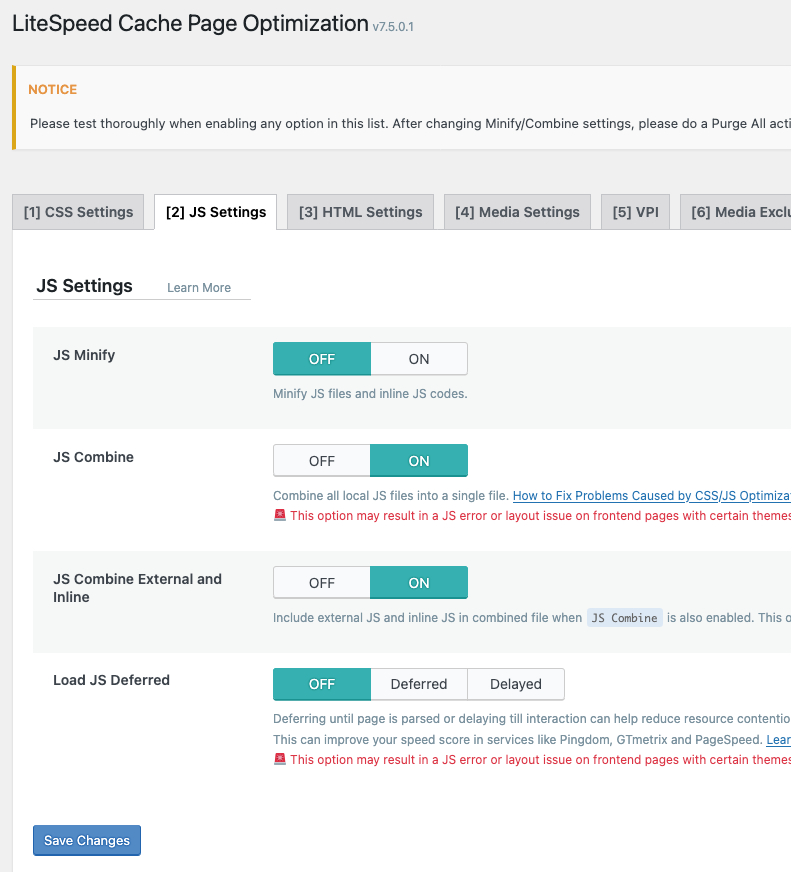
¶ JS Settings tab
The screenshot below illustrates a set of settings that functions well with wp2print. We recommend against enabling the Minify function:
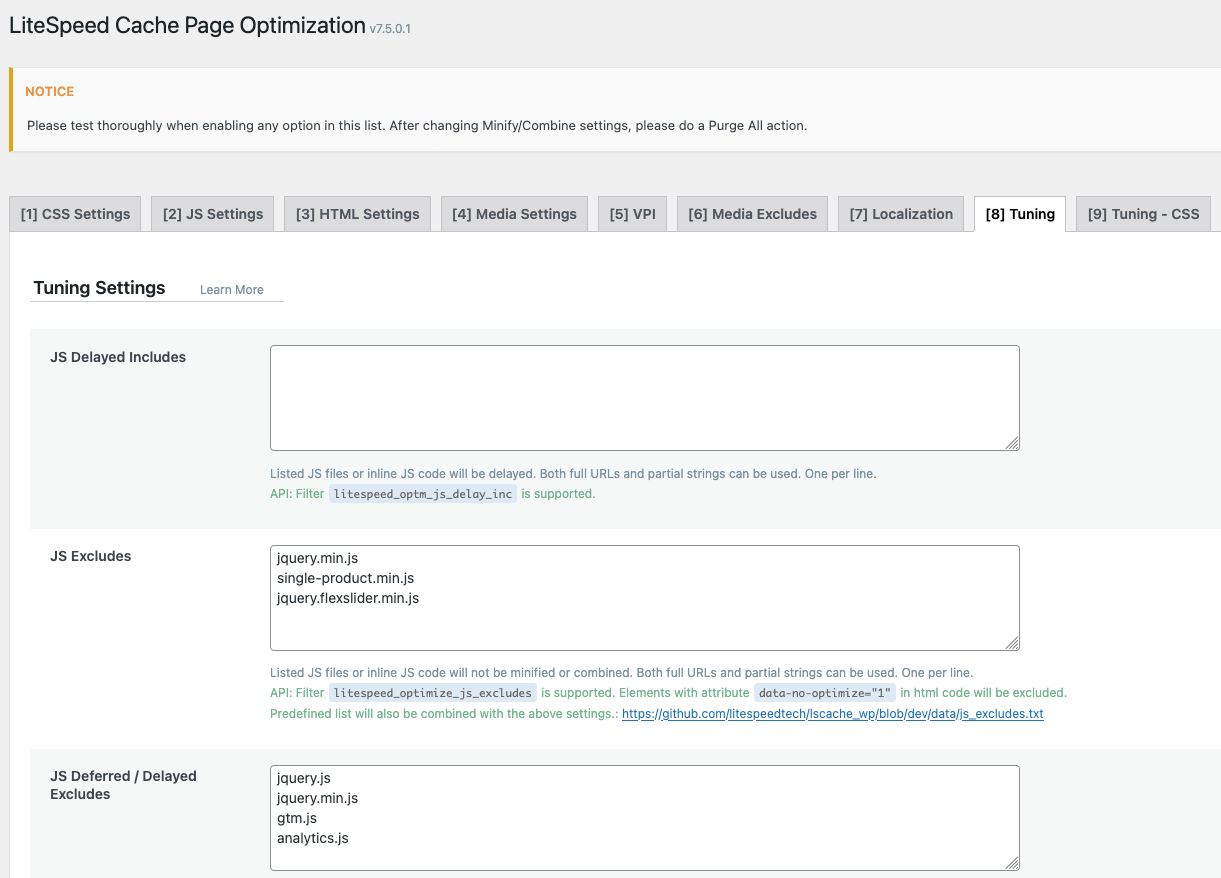
¶ Tuning
In the Tuning tab, we must configure LiteSpeed cache to exclude the following JS files:
JS Excludes:
single-product.min.js
jquery.flexslider.min.js
jquery.min.js
jquery.js
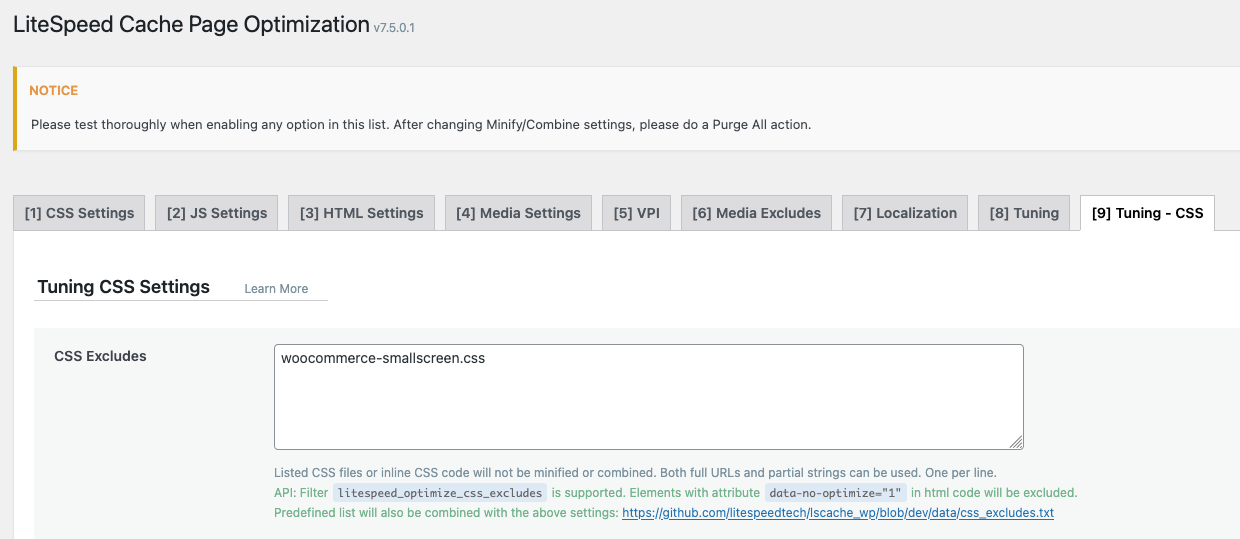
¶ Tuning CSS
In the Tuning CSS tab, we must configure LiteSpeed cache to exclude the following CSS files:
CSS Excludes:
woocommerce-smallscreen.css
¶ Purging the cache
This video will demonstrate cache purging the LiteSpeed Cache. This is an easy and important process which will avoid the problem of your customers seeing old data that is stored in the cache.